Wednesday 27 March 2013

Meet Brad and Ange

This is their untold story.

He first laid eyes on her one evening.  He was from a different class, being cut from more expensive fabric.  She was made from an upcycled pair of cotton pants, but he loved her sense of style:


Although she came from the wrong side of the fabric stash, she knew how to play the game and was very hard to get.

Beware of the cat

What could he do to win her heart?


Then, he had a lightbulb moment:


They travelled the whole entire backyard together.  What fun they had!  He loved her sense of adventure.  She loved his mean set of wheels.


Soon, so very soon:


Any similarity to rabbits living or dead is purely coincidental.

Happy Easter.

Monday 25 March 2013

Patchwork change mat

Still too scared to try actual quilting, I carried out a small-scale project on my sewing machine to try out topstitching through several layers of fabric.


Each square was roughly 13cm square (charm square size) that I handcut from my scraps and once I sewed them together I topstitched 5mm around the edges of each patchworked square.  I added criss-crosses on the white squares to give a little extra detail to it.

This baby change mat is backed with the same navy stripe that I used to bind it.  Handsewing the binding is much less time-consuming than a full-sized quilt (obviously) so I finished this in a few hours.  It's heading to a new home this week with the merino top.

Degree of difficulty: Easy
Time taken: 4 hours
Result: There is something very classic about the colours and stars and stripes, although a predominately white top may not be a practical choice for its intended purpose...

Thursday 21 March 2013

Batman merino top

This project was brought to you through a comment made by Sara, introducing the letter B for Batman. And Broken.  I was inspired by my very own little superhero, Renee, who fractured her arm in two places at school last week and went three days before it was properly diagnosed.  She's one very tough cookie.


Making this top involved a series of firsts for me - my first time using an overlocker/coverstitch for the majority of the project, my first time working with merino, my first time having to convert the machine from an overlocker to coverstitch and my first time doing appliqué.

So, I sat down in front of my shiny new overlocker, turned it on, and waited for a few seconds to see if I would automatically turn into this a-ma-zing seamstress, but nup, I just make more expensive mistakes that are really timeconsuming to undo.  Or impossible to fix.  Like the fact that overlockers cut off the seam allowance.  That I hadn't allowed for.  Ahahahahahaha...ahem.

It took me 4 hours to convert my Huskylock S21 to the coverstitch function and an hour and a half to change it back to being an overlocker.  An improvement, wouldn't you say?  I shall conquer this machine mountain, you just wait and see.

In my stash was a very small amount of merino in an interesting shade of calf scoury yellow and I teamed it with an old pair of leggings of Sienna's that I had planned to mend (honest!), but it was too good a combination to ignore.  I printed out an image of the Batman logo and used it as my template for the appliqué.


This merino of questionable colour is quite soft to the touch and would be so warm to wear so it seemed perfect for a baby's top.  Here are the leggings, enjoying their new lease of life as sleeves:


Constructing a garment using an overlocker was quite different for me in the sense that I needed to work backwards and coverstitch the necklines and bodice and sleeve hems first and then overlock the side seams together.


Sewing merino was also interesting as I am unaccustomed to working with stretch fabrics and found unrolling the edges of the merino as I overlocked a little fiddly but I much prefer using my fingers to guide the fabric through than pinning the garment to within an inch of its life.


This top is destined for another friend who had a little boy a few weeks ago.  I'm sharing this project over at Sewing Barefoot.

Time taken: 1 day
Degree of difficulty: Mastering my overlocker will be a work in progress, making the garment is very straightforward and I enjoyed appliqué so much I will definitely be trying it out again
Result: Even though I heavily criticized the colour of the merino, I really do like it.  I hope the top fits otherwise someone in this house might have a very well-dressed doll instead.

Saturday 16 March 2013

Recovered couch and cushions

Remember how I said I was in no rush to reupholster anything else?  Yeah, well, it's amazing how motivated you can be to completely recover four sofa squabs in a day when someone else is doing the work.


This Vono couch is part of a lounge set that includes two reclining chairs - which may or may not get the makeover treatment by me, my 
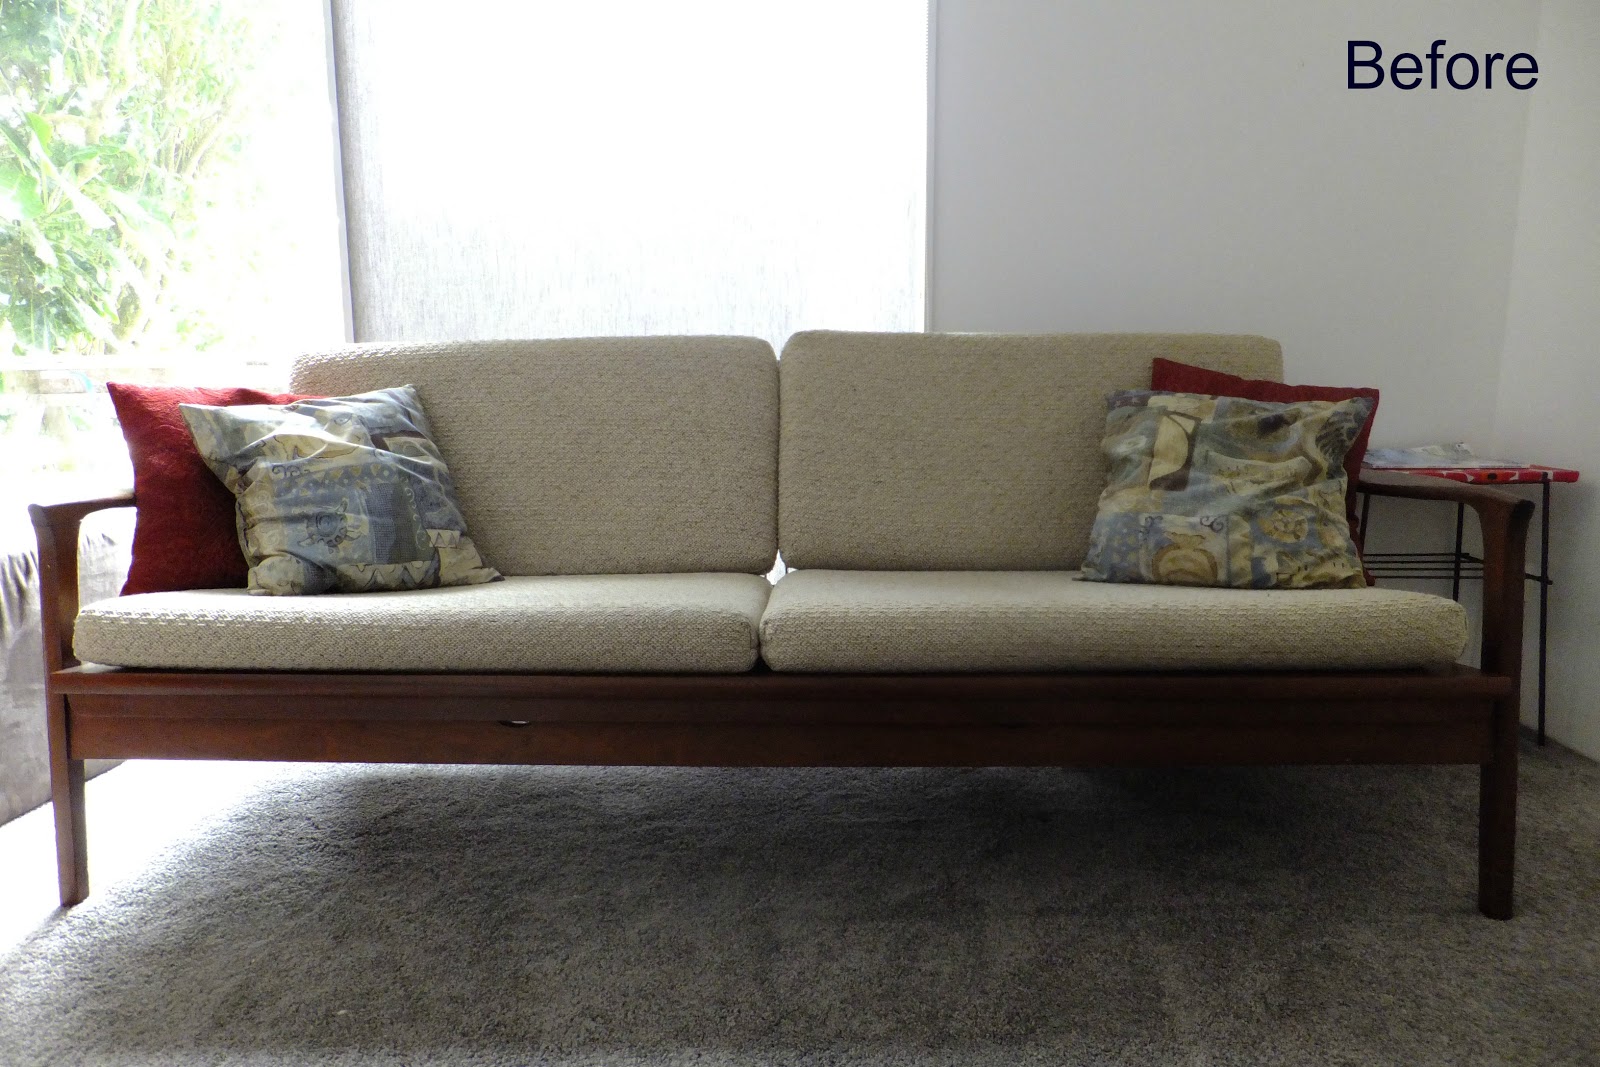
last attempt is still too fresh in my memory.  Look at it, being all sad and tired and blah.

And look at it now:


If this couch had a voice box, it would be totally be singing Oh Yeah right now.  Totally.  The fabric is an upholstery-weight material bought from Spotlight, which of course went on sale the weekend after we bought the material.  Roughly 5 metres was needed which was enough to cover the squabs and line the springs in the base of the couch.

And because we know that cushions make everything better, here are the zhushed-up cushions:


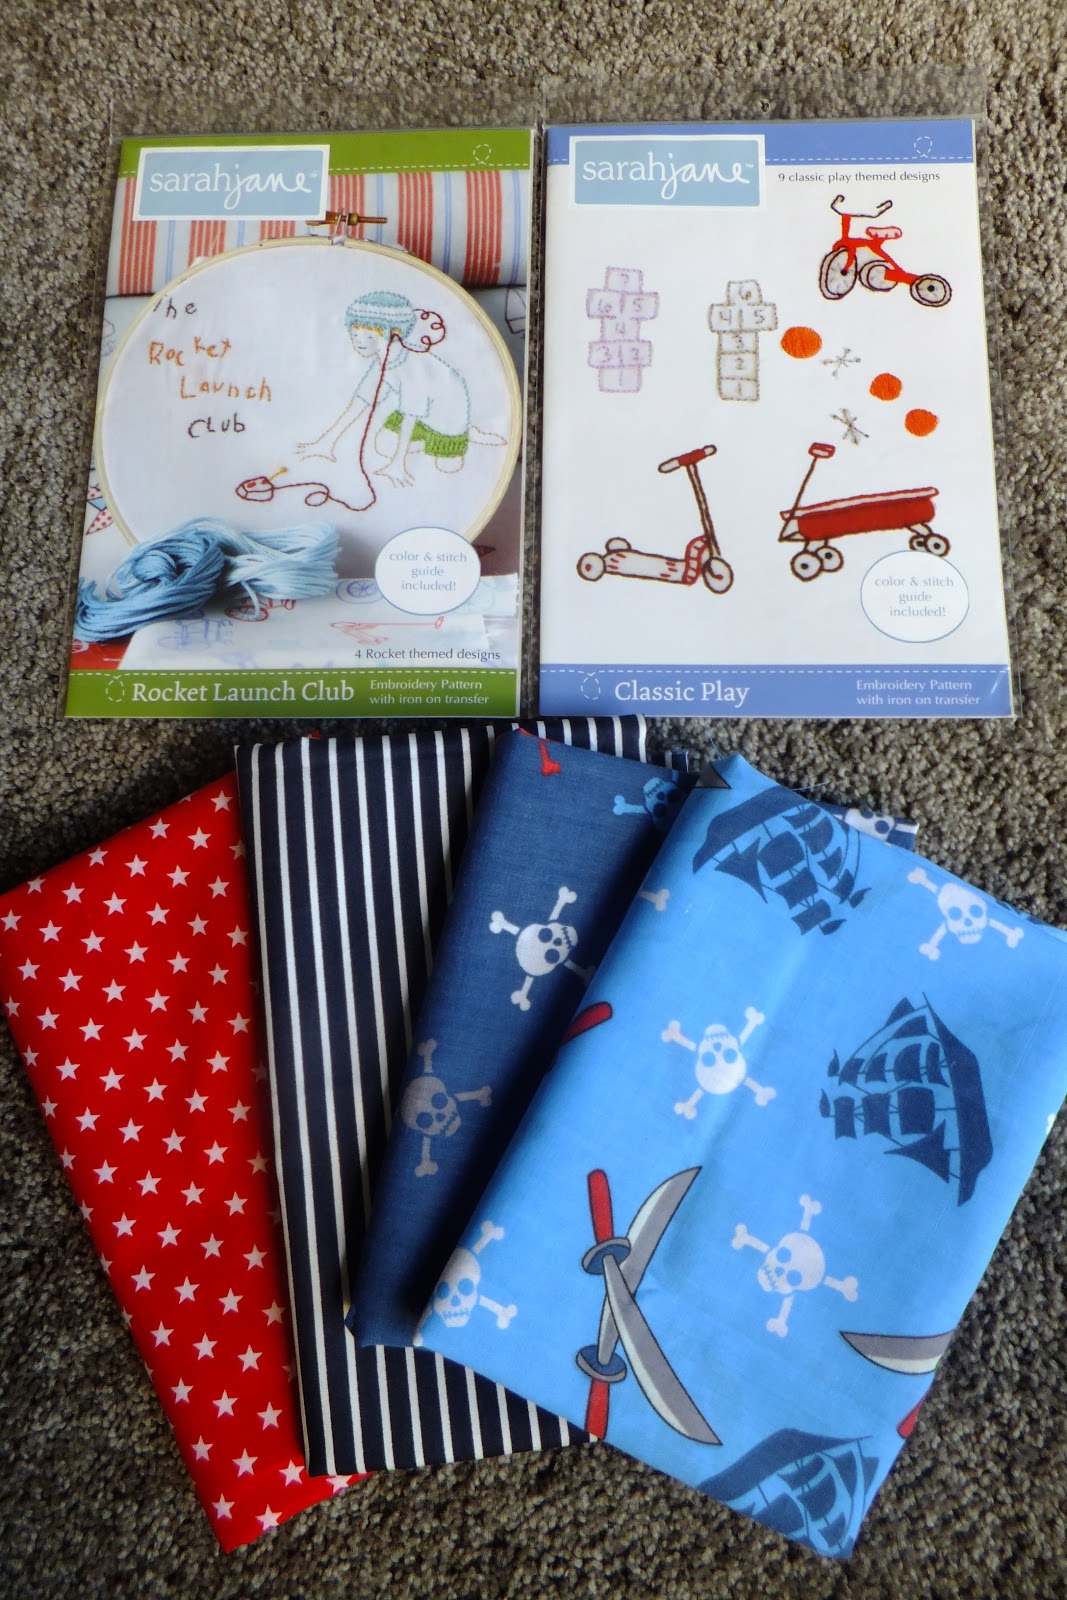
I made the cushion covers using some upholstery fabric remnants that I picked up from the ES Design sale on their $10 bundle table and the yellow ones were made from an old shirt of mine.  They are not my Forever pillows, but they'll do for now.


I'd love to say that this makeover was carried out mostly by me, but it really was more of a collaborative effort.  My husband bought me a nice shiny new overlocker a few months ago and I'm just a little bit scared of it. All those threaders and loops and things.  So, my lovely husband took the helm which meant I was tasked with the very boring important role of measuring, cutting and (of course) tidying up afterwards.

The ends of the couch squabs were boxed to achieve the square corners:


If you've ever considered attaching zips at the same time as overlocking seam allowances, here's a tip: DON'T.  The overlocker didn't appreciate that shortcut very much.  I have to say that my husband looks pretty darned cute sitting behind an overlocker.  He looked less cute after replacing one of the broken overlocker needles for a fifth time.


In my head, I was thinking that needle breakages would never have happened on my sewing machine.  Of course, we all know it is wiser to nod sympathetically, say nothing and hand over a new packet of overlocker needles.  If there is a next time, I would overlock the seam allowances and then attach the zips by sewing machine in two separate steps.

Time taken: 5 hours
Cost: $180.00
Result: Hellooo, Couch.  Oh Yeah.

Thursday 14 March 2013

Giveaway winners

You guys!  I am completely blown away by the response to my giveaway and would like to thank Michele from the Quilting Gallery for coordinating such a fabulous event.  I would also like to say a huge welcome to my newest followers.  I wish you could all win, but like the Highlander, there can be only one.  Or two.  So here they are:

For the Boys: Jo
For the Girls: Suz at Sewpony

Congratulations to you both, please check your emails for a message from me.

This blog hop has given me an opportunity to visit some really beautiful blogs and totally creative people who I may not have otherwise discovered, both internationally and domestically (and even one or two who live in my own town!) and I hope you all have been inspired just as much by what you have seen.

Thank you again to you all for taking the time to enter my giveaway and following along.

Friday 8 March 2013

Blog Hop Party and Giveaway

UPDATE
Comments now closed.  *Expectant hush*.  Check back soon for the winners' announcement.


Calling all Sarah Jane lovers, it's Blog Hop Party-time!!

Blog Hop Party with Give-Aways 

I will be hosting two little giveaways and one lucky winner will receive either:

1. FOR THE BOYS
2 x Sarah Jane embroidery patterns (Rocket Launch Club and Classic Play)
1 x fabric bundle (50cm x 100cm minimum cuts - not Sarah Jane fabrics, let's make that clear)

2. FOR THE GIRLS
4 x Sarah Jane embroidery patterns (Make It Do, Playing Dolls, Summer Flowers, On Parade)
1 x fat quarter and 1 x 1/4 yard cut of fabric from Sarah Jane's Children at Play fabric collection

All you need to do to enter is leave a comment telling me which giveaway you would like to win. Simple.  Being a member of my blog automatically qualifies you for two entries (feel free to join up) and sharing my giveaway with your friends on Facebook, Twitter or Pinterest will qualify you for another entry (please indicate which social media tool you used in your comment), so you could have three chances to win!

These giveaways are open to international readers - wahoo!  I will draw a winner for each prize on 14 March.  Anonymous commenters, you may have to be slightly less anonymous and leave your email address so I may contact you (go on, live a little).  If I have not heard back from each winner within three days, I will redraw another name.

The list of participating bloggers will be made available later so please keep checking via the link in the button above or here.  I hope you will take the time to visit the other blogs and enter some very exciting giveaways.  Now let's hop to it!

Blog Hop Party

Some of you may have seen a little button on my sidebar mentioning a Blog Hop Party with giveaways.

Around 190 bloggers worldwide will be taking part in this party, including little ol' me. Let's blog hop around the world, visit the participating bloggers and enter their giveaways - how exciting is that?

It starts on 8 March (USEST), so to keep within the rules, I will share the details of my giveaway and link to the party later on tonight.  Be sure to come back tomorrow and visit me to enter my giveaway. I'm so excited, I hope you are too!

Wednesday 6 March 2013

My first quilt

There's a special wee baby coming in a couple of months and it's got me thinking about baby quilts.  I have never quilted in my life, and with no clue at all about what I was doing, I joined some material together and then added binding.  That's quilting (albeit very basically), isn't it?  Maybe one day I will get brave and try Real Quilting.


Anywhooo, inspired by a quilt I saw on Flickr, I made my own one using the same Aneela Hoey Little Apples fabric.  The colours and cute prints remind me of autumn.  There are falling leaves, some warmly-dressed children playing games outdoors and cute animals including turtles and snails - what could be more fitting to symbolise the slowing down of the season than those creatures?


I used a thick bamboo wadding, it's so soft and luxurious and was very easy to sew with.

The binding is not a conventional size, but I like it a bit chunkier.  So there.  I hand-sewed the back of it (you can save the applause, although I did feel quite Quilterly doing that).  It took me hours to do this, but having completed it, I feel a sense of quiet quilter satisfaction.

Time taken: 3 days
Degree of difficulty: The most challenging part was making my own bias binding and mitering the corners neatly - I might need to practice those a bit more
Result: I hope my sister likes it, my blanket stash is getting ridiculous!

Friday 1 March 2013

Ch- ch- ch- ch- changes

First day of autumn, and with the seasonal change, I have realised that I am officially half way through this crafting journey of mine.  I thought I would freshen up my blog and add a selection of completed projects.  How far I have come since I nailed that oilcloth on that old table!  I have learnt how to fumble my way through navigate Blogger (an achievement in itself), taught myself how to crochet, delved into some sewing and DIY projects, became reaquainted with the sander and was painfully reminded that glue in a glue gun is really, really hot.

I've got a couple of craft items on the go at the moment and one nearly completed so I will show you that soon.  Thanks for coming along for the ride.